You'll Need#
1 piece of meat (any protein works - chicken breast, pork chop, or steak)
Salt
2 small plates
Timer
Sharp knife
1. Cut Test Pieces#
Cut two identical strips about 2 inches long and ½ inch thick from your protein. Save the rest for cooking later.
2. Salt and Time#
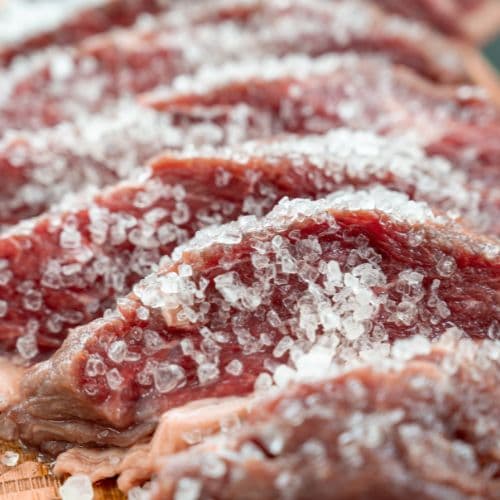
Salt both strips equally using a pinch per side. Place one strip on a plate labeled "Immediate." Place the other on a plate labeled "40 Minutes" and set your timer.
3. Observe Changes#
Check the 40-minute strip every 10 minutes and record what you see:
0 minutes: Salt crystals visible on surface
10 minutes: Surface becomes slightly wet and glossy
20 minutes: More moisture visible, salt mostly dissolved
30 minutes: Peak wetness, surface looks tacky
40 minutes: Surface drying again, firmer texture
4. Compare Raw Texture#
After 40 minutes, press both strips with your finger. Notice the difference in firmness and surface feel.
5. Taste Test (Optional)#
Cut thin slices from each strip and taste raw. Notice how salt penetration differs between immediate and timed pieces.
Success Looks Like#
The 40-minute strip should:
Feel slightly softer and more relaxed
Have salt flavor throughout when tasted
Show visual changes from wet to dry surface
Feel different in texture when pressed
The immediate strip will:
Remain firmer to touch
Taste salty only on surface
Show minimal visual changes
Why It Works#
You're watching osmosis and protein breakdown happen in real time. The immediate piece only has surface salt. The 40-minute piece shows how salt penetrates and changes protein structure throughout.
Quick Tips#
Use the remaining meat for your actual meal with proper 40-minute timing Try this with different protein types to see similar patterns Take photos of the visual changes to build your recognition skills Press both pieces at the end to feel the texture difference
Don't Waste the Test Strips#
After your experiment, put those small strips to good use:
Dice them for fried rice or pasta - perfectly seasoned protein pieces
Add to scrambled eggs - instant protein boost for breakfast
Toss in a salad - cooked strips make great salad protein
Use in stir-fry - quick-cooking strips work perfectly
Make a small sandwich - great for testing flavor differences after cooking
Apply This to Your Cooking#
Now you'll recognize these same visual cues on full-sized proteins. When you see the surface go from wet back to dry, you know the salt has done its work and the meat is ready to cook.