Basic Bread Mixing and Kneading
Master the fundamental techniques for developing gluten through proper mixing and kneading. Learn visual and tactile cues that indicate when your dough is perfectly developed.
What You'll Learn
- Identify the visual and tactile indicators of proper gluten development in bread dough.
- Select and apply appropriate kneading techniques based on dough hydration and ingredients.
- Troubleshoot common kneading problems like stickiness, tearing, and resistance.
- Adapt kneading approaches for special situations including enriched doughs, whole grains, and physical limitations.
Lesson Contents
Read through each section and complete the interactive elements as you go.
Introduction
Think about the last time you bit into a perfect slice of bread - that ideal balance of chewy interior and crisp crust. Behind that texture lies a fascinating transformation that happens long before baking: the development of gluten through kneading. Many home bakers struggle with this crucial step, unsure whether they're kneading too little, too much, or using the wrong technique entirely. The good news? With a few fundamental skills and some practice, you'll develop an intuitive feel for dough that will transform your bread making forever.
Kneading may seem like simple manual labor, but it's actually a subtle craft that engages all your senses. As your hands press and fold the dough, you're helping wheat proteins link together into an elastic network that captures gas, creating bread's characteristic texture. Without this network, your bread would be dense and flat rather than light and airy.
The process of developing dough structure through kneading is something our ancestors understood intuitively after generations of bread making. Today, we have the benefit of understanding the science behind these techniques, allowing us to adapt our approach to different flours, hydration levels, and bread styles. Whether you have strong arms or limited strength, whether you're making a rustic country loaf or delicate dinner rolls, you can master techniques that work for both you and your bread.
Understanding Gluten Development: The Goal of Kneading
When flour and water mix, two proteins found in wheat – glutenin and gliadin – begin to form bonds, creating the elastic network we call gluten. This happens slowly on its own, but kneading dramatically accelerates the process by physically manipulating these proteins into alignment. Think of it like untangling and arranging countless tiny strings so they can form a cohesive net.
The traditional kneading method has remained essentially unchanged for centuries because it works. Begin by pushing the dough away from you with the heel of your hand, then fold it back toward you, give it a quarter turn, and repeat. This action stretches and folds the proteins, helping them align and connect into a strong, elastic network.
Your body mechanics make a significant difference in how effective and comfortable this process is. Position yourself so that you can use your body weight, not just arm strength. Stand with your feet shoulder-width apart, with one foot slightly forward for balance. Your work surface should be at a height where your hands can press down with elbows slightly bent – usually about hip height for most people. Too high, and you'll strain your shoulders; too low, and your back will protest.
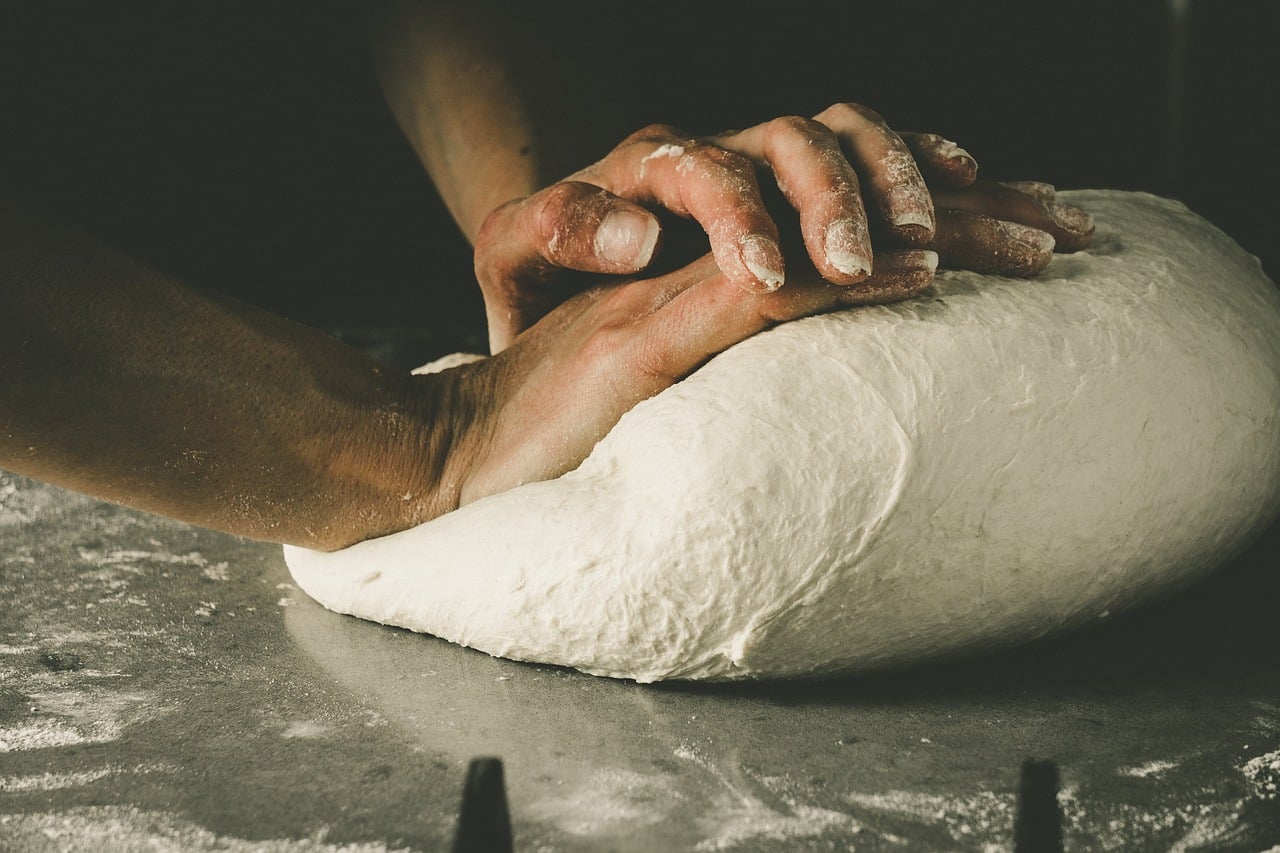
As you knead, pay close attention to how the dough changes. In the beginning, it will feel shaggy and may tear easily. Within a few minutes, it should become smoother and more cohesive. After adequate kneading, the dough will feel smooth and elastic, stretching when pulled gently rather than breaking immediately. This progression tells you that gluten is developing properly.
You'll know your dough is well-developed when it passes the "windowpane test" – a small piece gently stretched between your fingers becomes thin enough to see light through without tearing. This indicates that the gluten network has formed sufficiently to trap the gas bubbles produced during fermentation, creating the airy structure characteristic of good bread.
Working with Standard Dough
A standard bread dough with moderate hydration (about 65-68% water to flour by weight) is the perfect place to refine your kneading technique. This level of hydration creates a dough that's pliable but not overly sticky, allowing you to focus on developing a feel for the process.
As you knead standard dough, notice how it transitions through distinct phases. Initially, it may feel rough and tear easily when stretched. After a few minutes, it becomes smoother but still tears. With continued kneading, it develops elasticity – stretching further before tearing. Finally, when properly developed, it feels smooth, supple, and can stretch thin without breaking.
Under-kneaded dough has not yet developed sufficient gluten structure. It tears easily, looks rough rather than smooth, and doesn't hold its shape well. Bread made from under-kneaded dough will have a dense, uneven crumb structure and may not rise properly. If you notice these signs, simply continue kneading until the dough becomes more elastic.
Over-kneading is rarely a concern when kneading by hand – it would take 15-20 minutes of vigorous work to reach this point. Machine mixing, however, can over-knead dough within minutes. Over-kneaded dough feels tight and resistant, sometimes tearing when you try to stretch it. The surface might look overly smooth and may tear rather than stretch. If you suspect over-kneading, give the dough a 10-15 minute rest, which often allows the gluten to relax.
Sticky hands are a common frustration when kneading. For standard dough, a light dusting of flour on your hands and work surface usually suffices. Use flour sparingly, adding just enough to prevent sticking without incorporating excess into the dough. To clean dough from your hands, use a bench scraper to remove the majority, then rub your hands with a small amount of dry flour before washing with cold water. Hot water will cook the proteins, creating a sticky mess that's harder to remove.
Adapting to High-Hydration Dough
As you venture into rustic artisan breads like ciabatta or baguettes, you'll encounter higher hydration doughs (70% water or more). These create those beautiful open crumb structures with irregular holes, but they present unique challenges for kneading because they're significantly stickier.
Traditional kneading becomes difficult with high-hydration dough because it adheres to your hands and work surface. This is where alternative techniques become invaluable. The stretch and fold method works wonderfully for wet doughs: instead of continuous kneading, you stretch the dough and fold it onto itself from each side, then let it rest 20-30 minutes before repeating. This gentle, intermittent action still develops gluten but works with the dough's stickiness rather than fighting it.
For those comfortable with a more dynamic approach, the slap and fold (or French) method excels with wet doughs. Lift the dough with both hands, slap it down on the counter, then fold it back over itself. The dramatic movement might seem rough, but it's remarkably effective at developing gluten in wet doughs while using the stickiness to advantage – the dough clings to the surface during the slap, creating natural tension as you fold.
When working with high-hydration dough, water becomes your friend rather than flour. Wet your hands periodically instead of adding flour to prevent sticking. This maintains the dough's intended hydration level and prevents inadvertently creating a tougher finished bread. Some bakers keep a small bowl of water nearby for quickly dipping their fingertips.
After handling very sticky dough, standard cleaning methods often fall short. Try this baker's trick: before washing, rub your hands with a generous amount of dry flour. The flour absorbs the moisture from the dough, turning it into a paste that can be rubbed off. Then rinse with cold water, and the remaining residue should wash away easily.
Remember that high-hydration doughs develop differently – they may never become as smooth or firm as standard doughs, even when properly developed. Instead of focusing solely on dough appearance, rely more on the windowpane test to judge gluten development.
Special Dough Situations & Solutions
Enriched doughs containing significant fat (like butter) or sugar require adaptations to your kneading approach. Fat lubricates gluten strands, interfering with their ability to connect, while sugar competes with flour for available water. This means enriched doughs generally require longer kneading to achieve proper development.
When working with enriched doughs like brioche, use a gentler kneading technique with less pressure. The dough will feel silkier and less elastic than standard bread dough. Be particularly patient – it may seem like gluten is developing slowly, but persistence pays off. Some enriched doughs benefit from a two-stage mixing process, developing the gluten before adding the fat to ensure proper structure.
Whole grain doughs present a different challenge. The bran particles physically interrupt gluten strands, making it harder to achieve the same strength as white flour doughs. Kneading whole grain doughs requires patience and often benefits from a longer autolyse (resting period after initial mixing) to soften the bran. Use the same techniques as with standard dough, but expect to work a bit longer and achieve a somewhat less elastic final texture.
For those with physical limitations that make traditional kneading difficult, several adaptive approaches work beautifully. The no-knead method substitutes time for physical work – by mixing the ingredients and allowing an extended fermentation (12-24 hours), the gluten develops naturally without kneading. Another option is to use the "stretch and fold in the bowl" technique, which requires less strength and can be done while seated.
Large batches of dough can be physically demanding to knead. The solution? Divide and conquer. Split your dough into manageable portions for kneading, then recombine them for fermentation. This not only makes the process physically easier but often results in more even gluten development.
When troubleshooting common kneading problems, consider environmental factors. In summer, dough warms during kneading and can become stickier – use cooler water in your initial mix to compensate. In winter, cold kitchens can cause dough to feel tight and resist kneading – warming your mixing water slightly or kneading near a warm spot in your kitchen can help.
Remember that different flours develop at different rates. High-protein bread flours typically require more kneading than all-purpose flours, while softer European-style flours often need gentler handling. As you gain experience, you'll develop an intuitive understanding of how to adapt your technique to the specific flour you're using.
Conclusion
Developing confidence in kneading is truly a milestone in your bread-making journey. The skills you've learned in this lesson will directly impact every loaf you create, from the simplest sandwich bread to the most artisanal sourdough. With practice, your hands will develop a kind of muscle memory and tactile intelligence that guides you intuitively through the process.
Remember that the ultimate goal of kneading isn't to follow a specific technique perfectly but to achieve proper gluten development for the type of bread you're making. The windowpane test remains your most reliable indicator of success, regardless of which kneading method you choose.
As you progress to the upcoming Rustic White Boule recipe, you'll have the opportunity to apply these techniques to create a beautifully structured loaf. Pay attention to how the dough feels at each stage, and don't be afraid to adjust your approach based on what your senses tell you. That's what separates a technician from a true baker.
Over time, you'll find that kneading becomes not just a necessary step but a genuinely enjoyable, even meditative part of bread making – a chance to connect directly with your food in a way that engages all your senses and grounds you in a tradition that spans human history.